Jan 24 2024
Recording and Exporting p5.js Animations
I was recently asked to elaborate how I export videos of my p5.js sketches. I figured that one person asking means more people who don’t know and wont ask. So I’m writing this, documenting what works for me and why I made the decisions I did, in hopes that this can help.
I’ve had a good experience with p5.capture, a third-party JavaScript library. Though, a big caveat is that p5.capture does not support module bundlers at this time. Which makes using it with something like parcel.js or webpack a bit more tricky. In any case, I’ll cover two ways to use p5.capture.
Sketch Capture, Two Different Ways
p5.js Editor
This is the simplest way, where we modify the p5.js Editor by including the p5.capture library. This can be done by modifying the index.html. See the steps below.
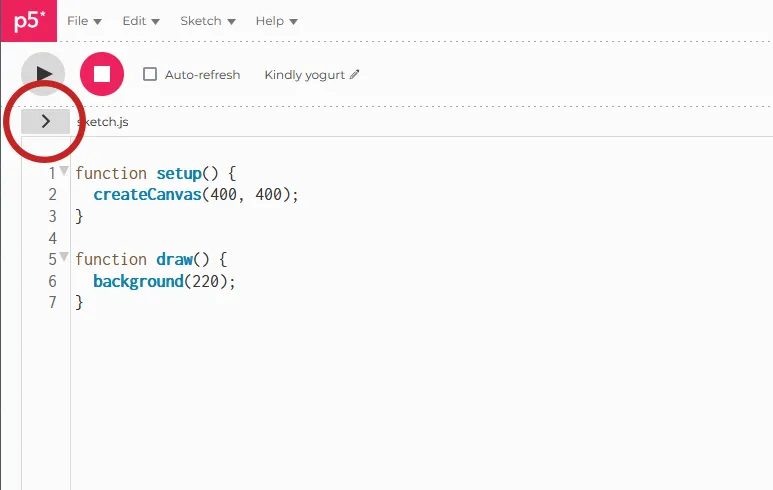
Step 1 - Expand the file browser
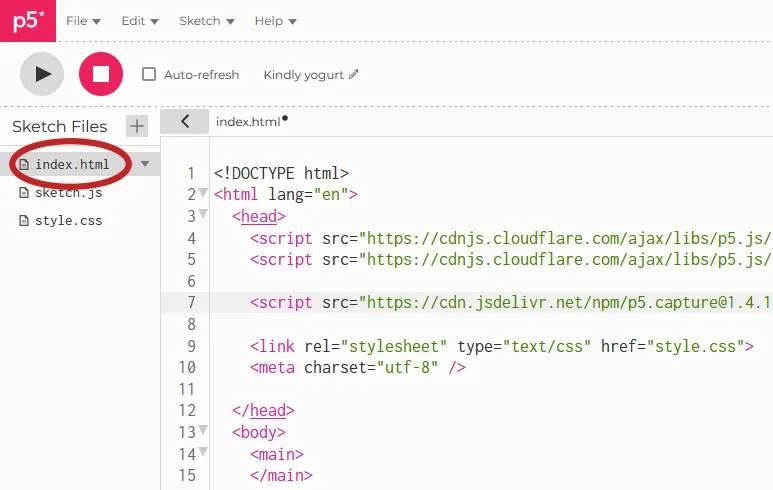
Step 2 - Open the index.html file

Now running the sketch will show an overlay that allows you to render out. I’ll go over my thoughts and preferences about format in the last section.
Standalone p5.js Webapp
This is what I do for my standalone p5.js webapps. Its what I did for genuary.dedovic.com in 2023, with much success. The general idea is to support a URL query string to enable automatic capture. To do this,
- include the p5.capture library, either using a CDN like jsDelivr or by redistributing it
- parse the URL search parameters for a special
?render=truequery string - conditionally instantiate and start a capture based on the query string
The basic Javascript is something like this:
// parse the URL query string, i.e. https://example.com?render=true&foo=bar
const params = new Proxy(new URLSearchParams(window.location.search), {
  get: (searchParams, prop) => searchParams.get(prop),
});

// the ?render=true|false query string
const isRender = params.render;

// setup defaults
P5Capture.setDefaultOptions({
  // this will download a zip of PNG files that need to
  //  be stitched together using something like FFmpeg or
  //  Davinci Resolve
  format: "png",

  width: 1080,
  height: 1080,

  // number of frames, at 30 fps this is 10s
  duration: 300,
  framerate: 30,

  // unless ?render=true is in the URL, the UI won't show
  disableUi: !isRender,
});

// this are the function p5.js requires
function setup() { ... }

function draw() {
  // first frame, when ?render=true in the URL
  if (isRender && frameCount === 1) {
    const capture = P5Capture.getInstance();
	capture.start();
  }
  ...
}
Including the above Javascript after the p5.js <script> element. The order is important. Now, when accessing the site, appending ?render=true to the URL will automatically start a capture over the configured duration of frames.
Refer to the P5Capture API to see supported options, such as the output format, quality, and file naming configuration.
The biggest caveat with this approach is that is cannot be used with module bundlers, such as Parcel.js or webpack. One workaround is to clone the p5.capture project and convert the index.ts file to a proper module, but that is beyond the scope of this writeup.
Formats and Options
In general, I prefer to output PNG files and stitch them together myself. I find this gives me the most versatility, at the cost of some extra work and tooling.
p5.capture supports WebP, PNG, and JPEG image sequences.
- WebP support on older iOS devices is poor (at the of writing this)
- JPEG is a lossless compression algorithm, meaning visible quality degrades
- PNG files are larger than WebP files, but are lossless
I generally don’t output video files as I can use encode my own videos at various levels of compression and color spaces that work for Instagram, my website, or other platforms. Keeping the “raw” PNGs gives me this versatility. The cost, though, is disk space and organization.
My FFmpeg Oneliner
ffmpeg -i path/to/images/%d.png -r 30 -s 1080x1080 -vcodec libx264 -pix_fmt yuv420p -crf 25 output.mp4
I’ll break apart the individual FFmpeg switches now.
- file input:
-i path/%d.png- the
%dsyntax expects an sequence of integers (1,2,3, etc) - using
%04dmeans a sequence of integers, padded with four0s (0001,0002,0003, etc) path/to/%d.pngexpands topath/to/1.png,path/to/2.png, etc.
- the
- framerate:
-r 30- 30 frames per second
- dimensions:
-s 1080x1080<width>x<height>in pixels
- video codec:
-vcodec libx264libx264is the free and open source H.264/MPEG-4 compression library from VideoLAN (VLC)- this is what we want for mp4 files, which are very portable across computers, browsers, Android, iOS
- there are other codecs which are worth exploring, such as H.265 and WebP
- pixel format / color space:
-pix_fmt yuv420p- this is the color space used in the video encoding
- YUV420P has good support on older iOS devices, Android, and nearly all browsers/computers
- there are other formats which are worth exploring, but this is usually dictated by the
vcodecswitch
- Constant Rate Factor:
-crf 25- I view this as the “compression” or “crunch” knob
- lower values are higher quality and larger files
- higher values are lower quality, smaller files
- as a rule of thumb, I keep this between 15 and 30
- Output file:
output.mp4- there is no FFmpeg switch for this, it is simply the last argument when calling
ffmpeg - the filename must be specified, and in my example, this is an MP4
- there is no FFmpeg switch for this, it is simply the last argument when calling
Conclusion
As usual, hope this is helpful. Always feel free to reach out if I’ve made a mistake, if something needs clarification, or if you have further questions!
Thanks for reading.